Bazza Nava
Bazza Nava Devlog #5 - It's Shader Time
Last time, I left you with a mystery: What does the 0 button do??? Now it's time to answer that question. Like most interactions in Bazza Nava, it does a silly and pointless but fun action. More exactly, it will allow the players to apply random visual and audio effects! Which mean I get to play again with Godot's audio effects and buses, buts most importantly… with shaders!
Fun fact: I initially intended to have a radio as an instrument for 0, which would sing or shout "Bazza Nava!" in different ways. But as I struggled to find a 3D model for a radio, I found that joke less and less funny. And given that it would be hit like all other instruments, it would never shut up and not be musically very great. So I changed my mind for something more "meta".
Playing with shaders
This is the very first time I use shaders! Needless to say this is both exciting and intimidating. My goal however was not to become a master of shaders. I just wanted to know the basics, so I could be able to take inspiration from existing shaders, reproduce them, and edit them a bit.
Fortunately the Godot documentation about shaders is really great! As of most of Godot's docs. It's even entirely translated in French! My only regret would be that a lot of information are scattered across several pages. But they are well organized, relevant links are always provided, and at least it's not an intimidating wall of text. The most helpful resources were Custom post-processing (that explain how to apply a shader to the whole screen, using a Viewport), Your first canvas item shader (basics for texture shaders) and Migrating to Godot's shader language (that provides helpful tables of variables and their equivalent in other shaders language). Although I recommend reading the whole shaders section.
Side note: Godot also provides Visual Shaders, a GUI to create shaders with nodes. As I have seen how powerful those kind of tools could be, I tried to use it a bit. But I lacked the knowledge to make it work as I wanted, and there's unfortunately not a lot of resources on it yet. Plus, it has been updated in Godot 3.1. Meaning that a lot of resources from the Godot Asset library are not compatible anymore. Still, it has a lot of potential, and maybe I will use it another time when I understand shaders better!
First thing I had to do to apply shaders to the screen was to create another scene that would encapsulate the main one. A 2D scene, with only a Viewport (containing my main scene), and a ViewportContainer on which a shader material is applied.
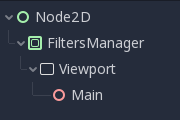
FiltersManager here is the ViewportContainer. All it has to do, when "0" is pressed, is to change the shader resources on its material. Not only it is super easy to implement, it also allows me to test shaders on the fly, without even the need of starting the game! Since shaders can be saved as a Godot resource, I could provides a list of them to my script, and select one randomly to apply it.
Now for the shaders themselves… Well, it was tough to learn! And to be honest there's a lost of things I still don't grasp at all. Despite what I've read, I'm still unable to write my own shaders. There's a whole logic I'm not familiar with yet. And also basics concept that I'm not sure I understanding well. What is a UV exactly? The difference between SCREEN_UV and FRAGCOORD? What's a Sampler2D? Why can't I read pixels directly from TEXTURE? Why am I constantly reminded that I can't read other pixels, yet I have the impression that it is what most scripts do anyway (especially the Sobel filter)? If I want to really understand how all of this work, I think I should read more thoroughly The Book of Shaders. The few I've seen from it are really helpful explanations! But I didn't found any section about altering an existing texture, so it's not the resource I relied on the most.
Instead, I looked at Shadertoy! A fantastic collection of shaders that you can try directly in your browser. Initially I wanted to "take inspirations" from some, but it appeared really quickly that I would not be able to reproduce them anytime soon. Thus, since all those shaders are under a Creative Common License, I selected some of them and directly adapted them into the Godot shading language. Thanks to the godot documentation linked above about migrating language (that includes a section for shadertoys), it was easy to find what needed to be replaced, and by what. On top of that, the Godot shader editing tool provides compilation error that allowed me to see quickly what was incompatible. This was an efficient way to learn some shaders techniques! Since it wasn't just copy pasting, the reading of some functions helped me getting a grasp on what was going on. I even have been able to mix different shaders, and alter some a bit! Of course, all the original shaders and their authors will be properly credited.
In the end, one of the most tricky task was to properly filter the shaders while searching. There's a lot of shaders that generate things, while I wanted shaders that alter things. I still don't know if there is a conventional separation between the two? They are often mixed, and like with the Book of Shader, most research on shaders brings shaders to generate shapes rather than shaders to change a picture or a video. For shadertoy, after trying to find keywords by luck, I've eventually found that the "Webcam" filter gives relevant results.
This way, I've been able to make nine different visual filters for the game! They are selected randomly when the play press 0, and disabled when they press it again. I've made it so the whole list is displayed in a random order, so that the player is sure to see them all, and specifically trigger the one they want after that. Here is a little preview:
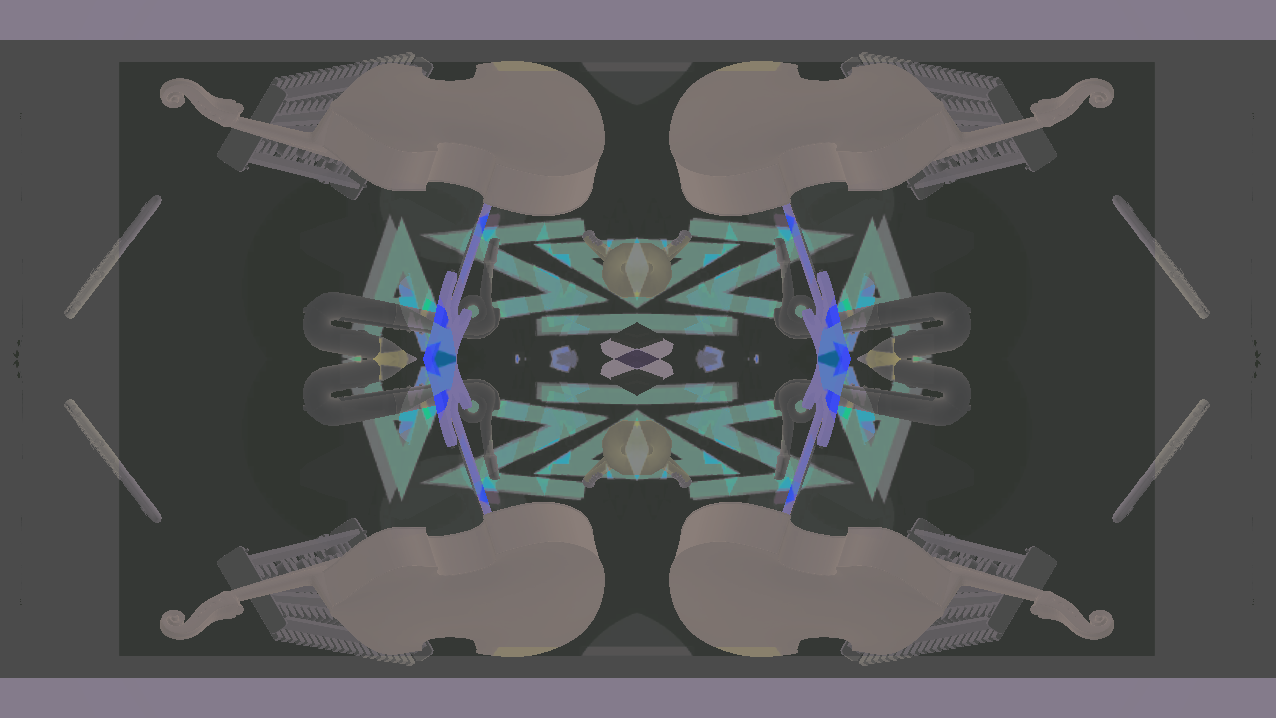
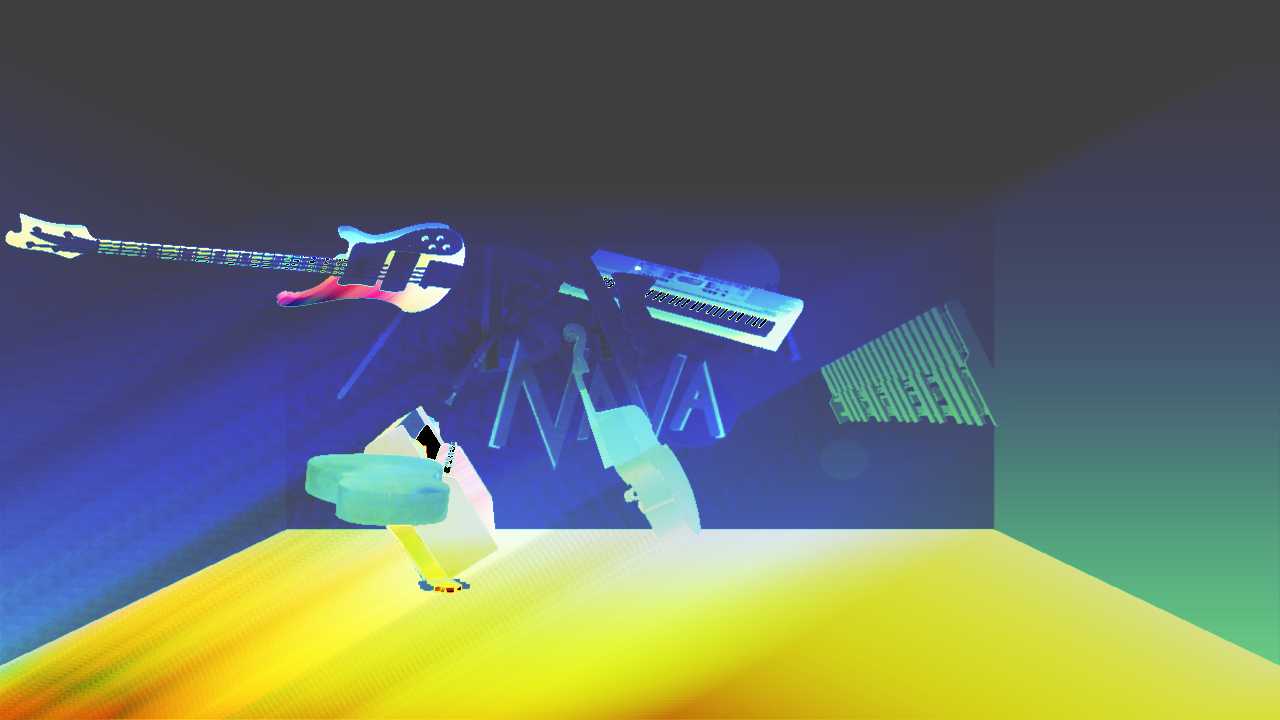
Most of those filters are quite simple (I still wanted to understand them a bit), but satisfying enough in term of visuals… By the way, remember the orthogonal view that I hesitated to use? Well, I also use it in some of the effects! It was too good to be thrown away.
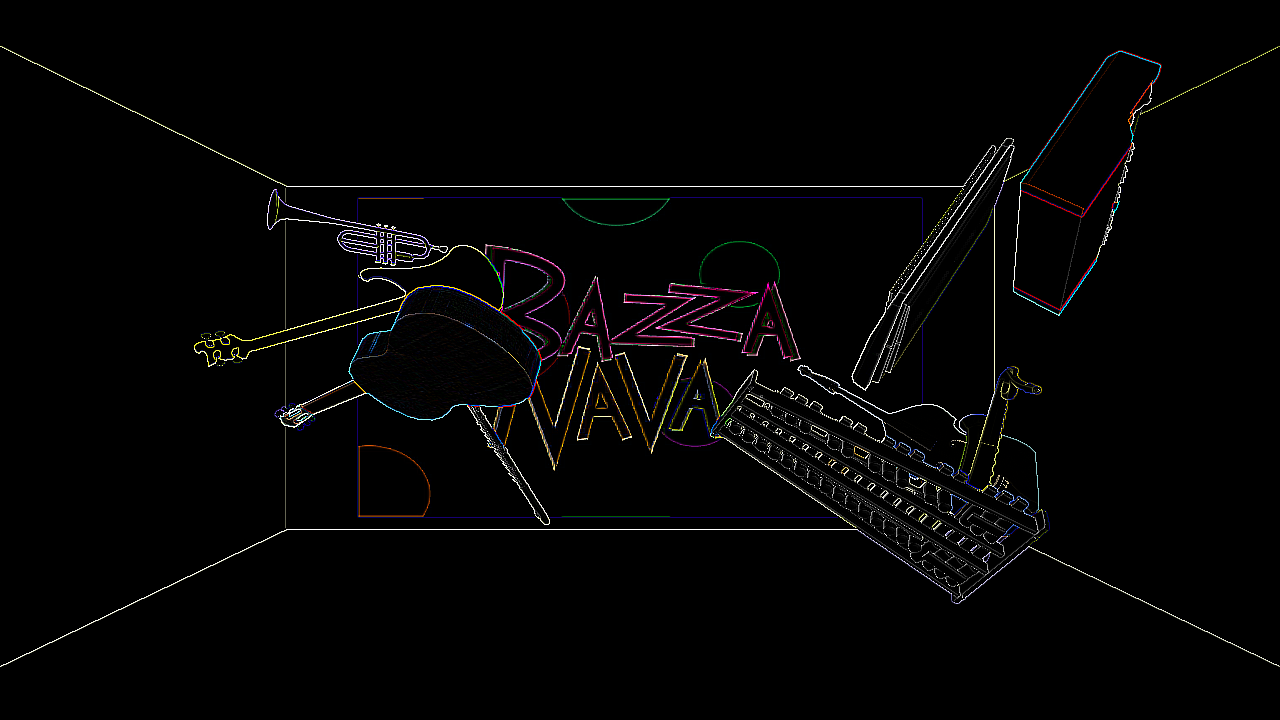
The only downside is… The default game look quite bleak in comparison. See for yourself:
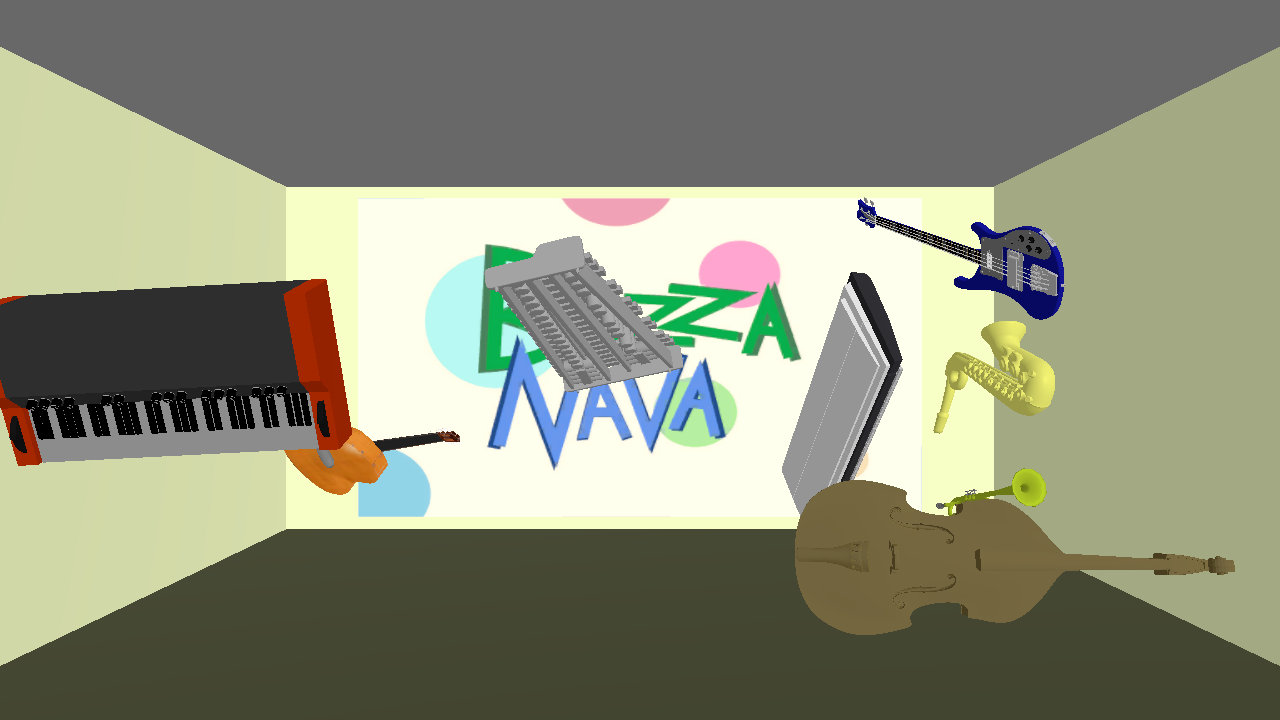
While the shaders version are full of vibrant colors and nice effects with movement, this empty room feel static, with dull colors. I should certainly fix that! Because the default look is still the one I want players to spend the most time on, given that the effects also have audio effects that make the music a bit too erratic. Maybe I should walk away from that cartoon look and see what I can do with lights. And maybe add textures to the floor or even the wall? The room must not be too charged though, as I still want it to look like a "boring" repetition room. But there must be something I can do to make it at least pleasant (see the Stanley Parable as a reference: the game take place in a boring office, but the architecture is really polished everywhere, giving the game a great look).
But that will be for another time! For now, let's talk about the second half of the effects.
Audio effects
Godot provides a nice range of audio effects, so it wasn't too complicated to make those. They can even be saved as a game resource as well! All I had to do then was to try them on a bus, then save the ones I like. Then I could pass them to my FilterManager in a array of array of audio effects. Yes, each effect is composed of several audio effect sitself. And they are all associated to a visual effect, to feel more or less cohesive. An shader effect with strange colors will have a reverb and a delay to create an dream mood, one with heavy pixels will have a distortion to make the music sounds glitchy, etc… It's a lot of experimentation and adjustment to make each sound effect a bit pleasant (and not too loud, even though I added a Compressor on the Master bus to prevent that), but it's doable.
Now, the tricky part was: how to integrate those effects during the game? I you are not familiar with audio buses in Godot, here is how it looks for Bazza Nava:
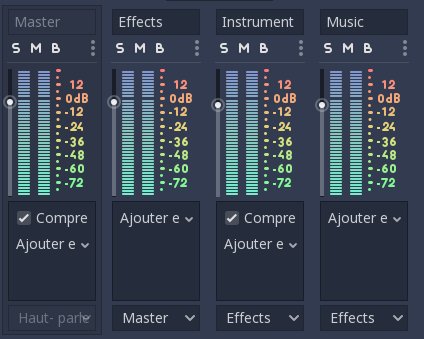
Buses are connected from right to left, Master being what the player hear eventually. Audio effects are applied to a specific bus. You can also manipulate buses during the game, by creating new ones, adding or editing effects, or connecting them differently. To do so, they must be identified by their index. Here, you can see that "Instrument" and "Music" are connected to the "Effects" bus, which itself send its sound to Master.
My first solution was to directly add and remove effects on the Effects bus. There are functions that allow to do that, making it pretty straightforward. It works for most effects… Except delay. Delay, if you are not familiar with, is an effect that creates echo by repeating the sound. I guess this effect is a bit special, as it needs to "remember" what has been played earlier and create a loop? Anyway, instantiating this effect on the fly wasn't working, as it just removed all sound from the game (even after being removed!). I might create an issue on that (I just have to check if this error is also present on Godot 3.2). But I wouldn't be surprised if this is impossible to do.
However I had some effects that use delay, and I wouldn't give them up so easily! So it's time for solution two: create several buses with the effects at the start of the game, and connect them in the chain to apply them! This solution is a bit more complex. First, buses can only be connected in the "left" direction. Which mean that if I create a bus at the end of the existing list, I won't be able to connect "Effect" to it. It has to be set between "Master" and "Effect". Fortunately Godot allows to insert bus in the list, and adding a bus this way (at the index 1) just moves the index of the other buses. Which leads to another issue: Instruments in the game also create their own buses (with an Amplify effect, see previous devlog), and they do so before the FilterManager (since audio effects are passed as props, we can only create the buses once the node has entered the tree, in _ready). If their audio bus is moved, the index they store is not valid anymore! Well, they don't use it once it has been initialized, but still, that is quite error prone. Once again, there is a simple solution: name the audio buses, so that we are able to find their index with the function AudioServer.get_bus_index(bus_name: string) even if it has been changed! This is a good practice that I will keep for my future games in Godot: never rely solely on the bus index.
Anyway, this solutions worked well. At the start of the game, I have all my effects buses created and named. When I need to activate one, I just have to connect "Effects" to the right bus using its name. To deactivate it, I connect "Effects" back to Master. And this time the delay work properly! The only "downside" is that it take some time to fade away once it's disabled. But once again, this is probably due to how the delay effect work.
Now that this is done, I almost have a fully playable prototype! The main thing that it lacks is a GUI, which I will work on now. Start screen, end screen, and a way to quit or restart the game. Then I will add some polishing: redecorating the scene as said above, tweaking some instruments, and maybe adding a bit of furniture. I hope to release it on June (or even before if everything turns out well)! We'll see how it goes.
Leave a comment
Log in with itch.io to leave a comment.